Additional terminal settings.
Transfer files via USB to PinPad from Windows
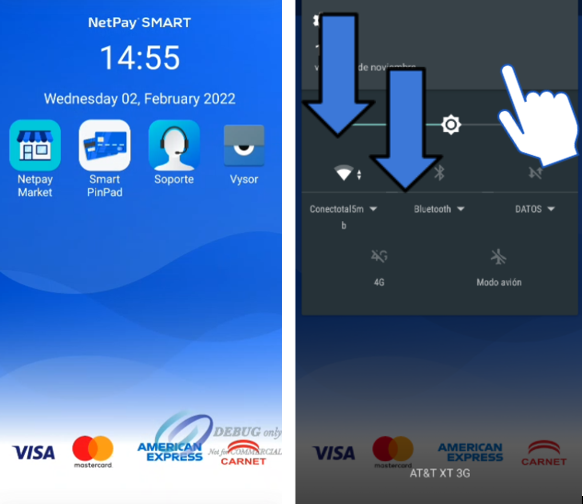
1.- On the main screen, slide down to show the notification area and then one more time to show the settings as shown in the image.
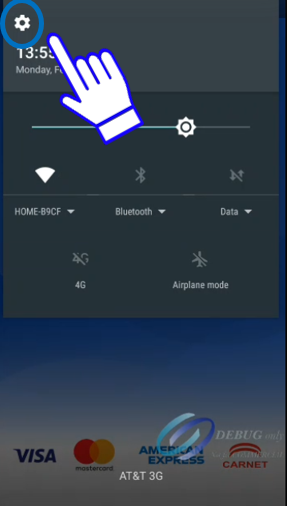
2.- We select the configuration option, as shown in the image (gear icon).
To be able to display the general settings.
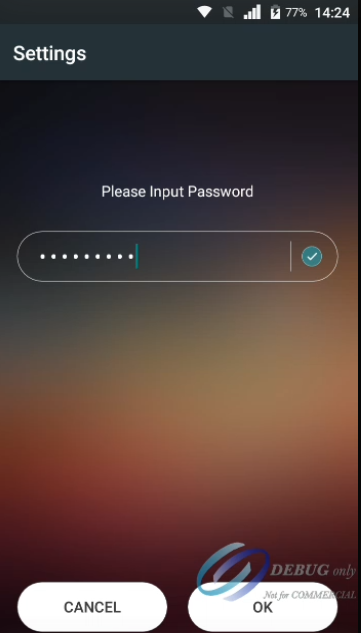
3.- When selecting the settings icon, a screen will appear where we must indicate the password to access. This password must be requested to NetPay.
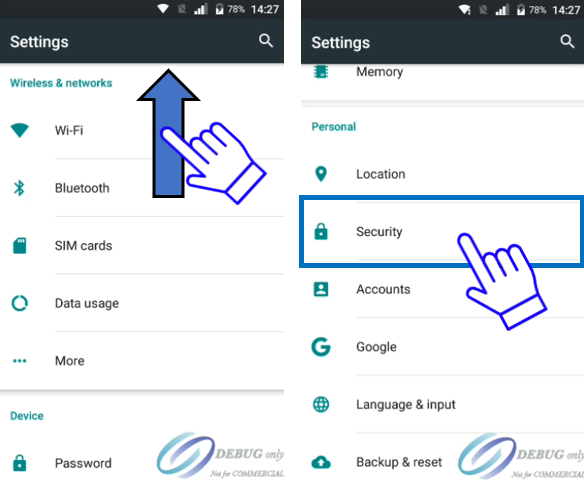
4.- When entering the settings screen, we slide down until we find the "Security" section.
5.- In the security menu we select the option “select USB configuration”, two options will appear, ADB and MTP.
ADB: This configuration will allow you to connect the terminal to compile, debug and share screen, but you will not be able to access the files from windows.
MTP: This setting will not allow you to compile or debug from Android Studio or some other IDE, but will allow you to access terminal files from the Windows file browser.
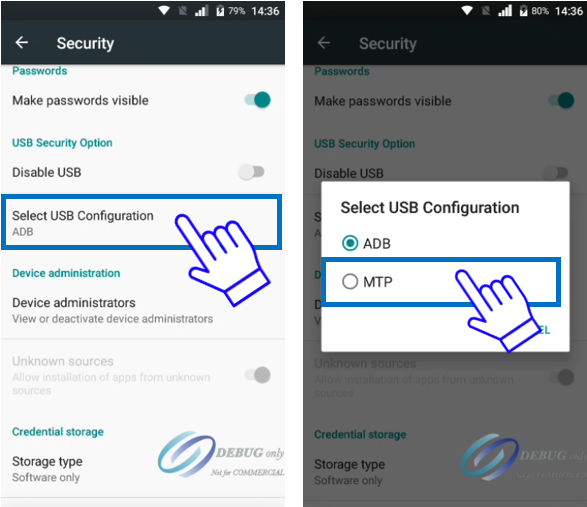
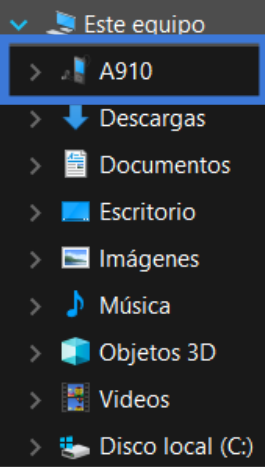
IMPORTANTIt is necessary to switch between modes to be able to perform the different tasks. Once the “MTP” option is no longer occupied, you will have to return the configuration to “ADB” to compile, and viceversa.
PinPad File Explorer
In order to access the file explorer and locate the APKs that you have transferred to your device, you will need to follow the next steps.
1. We position ourselves on the terminal's main screen.
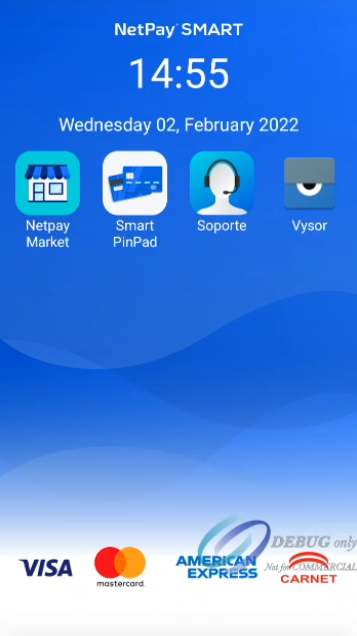
Main screen
2.. Slide down to show the notification area as shown in the image.
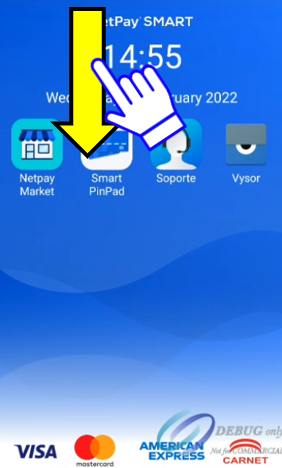
Slide notification area
3. You must slide down again to the bottom of the screen to fully display the options. The one that interests us is the one of configurations with the following icon and it must be pressed to continue.
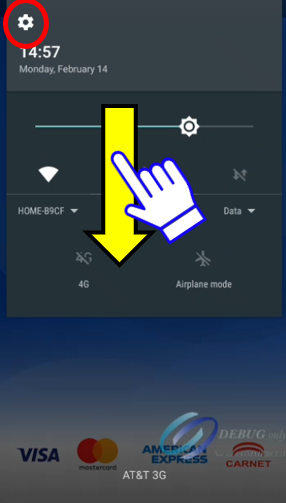
Slide settings
4. After selecting the settings icon, a screen will appear where we must indicate the password to access. This password must be requested to NetPay.
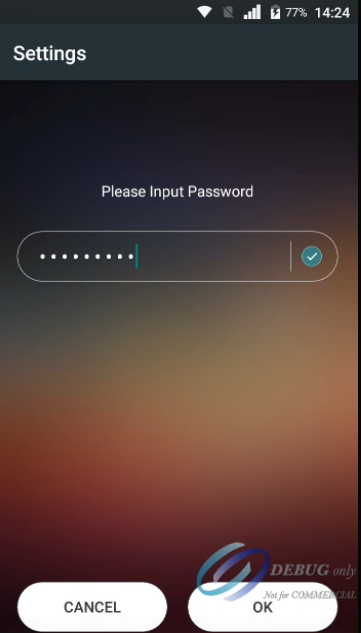
Enter settings with password.
5. Once the password is correct, you will view following section. You will have to scroll down until we find the storage and USB option as shown in the image above.
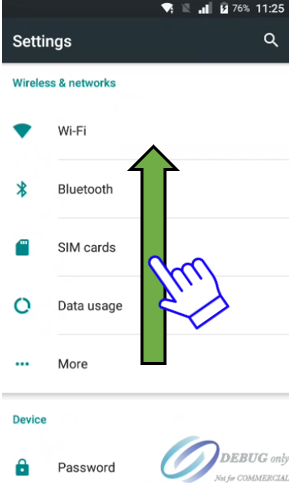
Settings
6. When we find the Storage and USB option, we press it to continue with the next step.
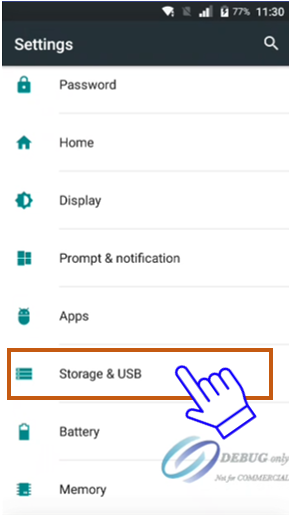
Accessing Storage and USB
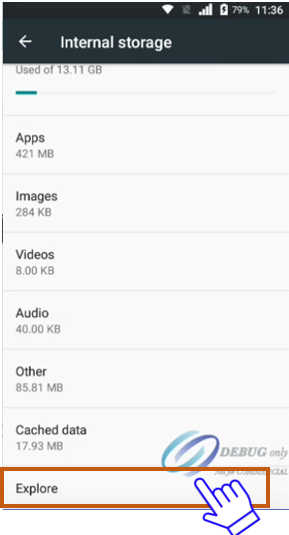
7. You must slide and find the Explore option to press it later.
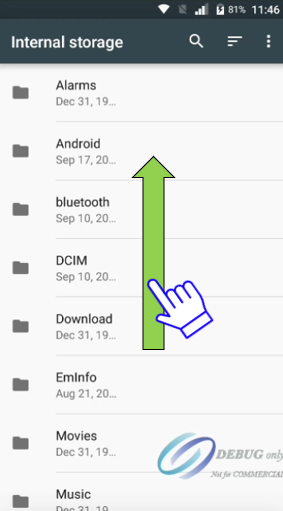
8. You must scroll and find the directory where the apk was placed.
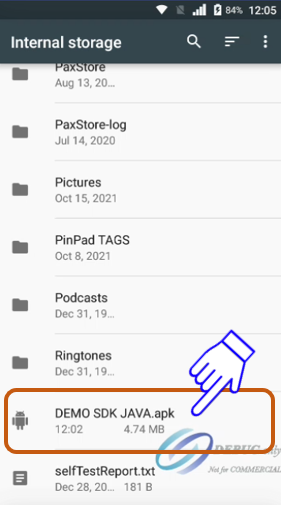
9. As an example we present an application already sent to the terminal that can be viewed in this browser and then selected to install and continue with the integration process based on the documentation shared above.
Updated 8 months ago
