Initial terminal configuration
Getting started.
1. Requirements
2. Install Smart PinPad DEV
3. Login
4. Configuration (optional)
5. Activation of Smart Pinpad
6. Blocking physical navigation buttons
7. Exit app
8.Sandbox environment
9.Special features
1. Requiriments.
• Smart terminal. In case you don't have one, please contact your Netpay's commercial advisor.
• Ask NetPay's Integration team for test credentials.
• Download and set up the sandbox environment Smart PinPad DEV app.
• Terminal must be connected to a WiFi network.
• Reference DLL library on your POS and access the corresponding methods.
The connector consists of a DLL library that can be integrated into any POS project based on Microsoft Windows technology.
2. Installation of Smart PinPad DEV.
Get into Netpay Market app, this is located on the terminal's main screen
Note.The Smart POS terminal offers an app store (Netpay Market), this will allow you to install and update apps, watch the status of the components, etc.
Search "Smart Pin Pad DEV" application, the latest test version at the store is 1.3.8.1.p.p_20221101, select it and press the green button "GET".

After selecting version "1.3.8.1.p.p_20221101" of Smart PinPad DEV, the following screen will be displayed indicating the space needed for the application. Then press the green button "INSTALL".

Once the download starts, a progress bar will show indicating the download progress.

At the end of installation, the button will change its message from "PAUSE" to "OPEN".

ERROR 13During the Smart PinPad installation process you may get an error 13, this is a common error and has a solution, please read the following steps.
This happenswhen you have the App de Pagos already installed and you want to install the Smart PinPad or viceversa, you can have one only one of them, since they share the same data and cause compatibility conflicts.

In this case, it is necessary to request support to NetPay,they will help you uninstall the unwanted app, then install the requested app do not try to uninstall the app, as it may cause problems in some scenarios.
3. Login.
Get into the Smart PinPad application on the home screen.

The "Bienvenido a NetPay Netpay Smart" screen will be displayed, then enter the Store ID and Test Password, these are provided by the NetPay's Integrations team. Then press the "Start" button.

We must complete this step to indicate the terminal what Store ID we will be working with. Login is a one time only, after that a blank screen will appear with "NetPay" written on it.

4. Terminal Configuration.
Smart PinPad has a hidden settings menu. To get access to it, press and hold for two seconds in the lower right part of the screen.

Enable the following options in the terminal.
- COMM: This option will allow the connection to be made by cable.
- Restaurant menu:
This setting allows you to enable the following options on the initial NetPay screen:
- Calibrate
- Transactions
- Totals
- Close
- About
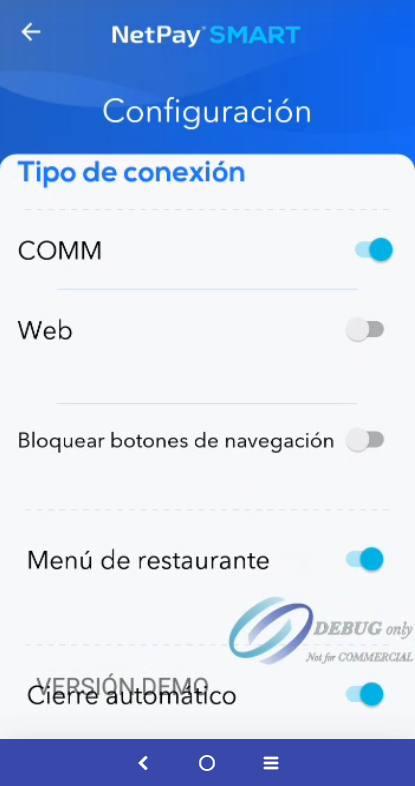
NoteThe options enabled by default in the terminal are the following:
- Months without interest: This option allows you to have the MSI flags enabled depending on the ones that the client is going to implement (3, 6, 9, 12 and 18 months)
- Automatic Closing: This option helps when the terminal arrives around 450 transactions, an automatic cut is made. This will keep all of the previous transactions out of terminal and therefore run out of memory.
- Registered Token: For this integration, this section is only informative and has no impact if it shows "Registered" or "N/A" since this section is meant for an access token of our API service.
5. Activation of the automatic start of the Smart PinPad.
NoteThis setting applies only to SmartPinPad DEV versions 1.3.2 or later.
For this integration, by activating the COMM option as mentioned above, the terminal will start the Smart PinPad application automatically,this will remain like this even if the terminal is restarted or turned on again.
When the terminal is restarted or turned on, the automatic start will remain in standby mode at the launcher start for approximately 25 seconds, until the terminal finishes with the loading process of other services and applications, as shown in the following image.

Once 25 seconds end, the application is automatically launched and ready to use.
NoteBefore the Smart PinPad automatically rises, we recommend taking no action as this may cause problems when the application starts.
6. Blocking of physical navigation buttons.
This setting applies only to SmartPinPad DEV versions 1.3.2 or later.
In the same way when activating the COMM option and activating Block navigation buttons, as shown in the following image, the physical navigation buttons will be blocked, this is an optional function that if it is required to use, both options must be selected , otherwise the navigation buttons will not be locked.

The physical navigation buttons are the touch buttons found on the bottom of the terminal, as indicated by the arrow in the following image.

NoteTo enable the Block navigation buttons option, the COMM option must be activated, otherwise this option cannot be selected, as shown below.

7. Application exit.
NoteThis setting applies only to SmartPinPad DEV versions 1.3.2 or later.
If the user needs to exit the application, they will have to press the two hidden buttons at the same time added to the main screen, the first is found in the words of NetPay (red box) and the second is found in the lower part of the left side (green box), as shown in the following image.

Once the buttons are pressed, the confirmation message is displayed to exit the application, in which we will accept, as shown in the following image.

At the time of accepting, it will send us to the start of the launcher and the physical navigation buttons in the terminal will be activated again.

NoteWhen the COMM option is activated for the first time, in order for the configuration of the automatic start of the application and the blocking of the physical buttons of the terminal to be carried out, you must return to the main NetPay screen by means of the return arrow.
If the user exits the application either by pressing accept in the confirmation message or in another way, when reopening it the changes are made and it can continue to be used as usual.

The app will return to the NetPay screen.

Important● For the terminal to receive a transaction request from the point of sale, the terminal screen must always have the Smart PinPad DEV application open, as shown in the previous image.
● The terminal must be connected by USB cable to the computer where the point of sale is located and the necessary drivers must also be installed.
● If there are multiple disconnections, the cable is most likely damaged or not properly connected.
8. Sandbox environment.
There is a Development environment to carry out the integration and certification tests in a controlled environment where no charge will be real.
SANDBOX BASIC URL:
http://nubeqa.netpay.com.mx:3334
To switch between environments you only have to change the base url, configure the accesses of each environment and in case it is required to change between application versions.
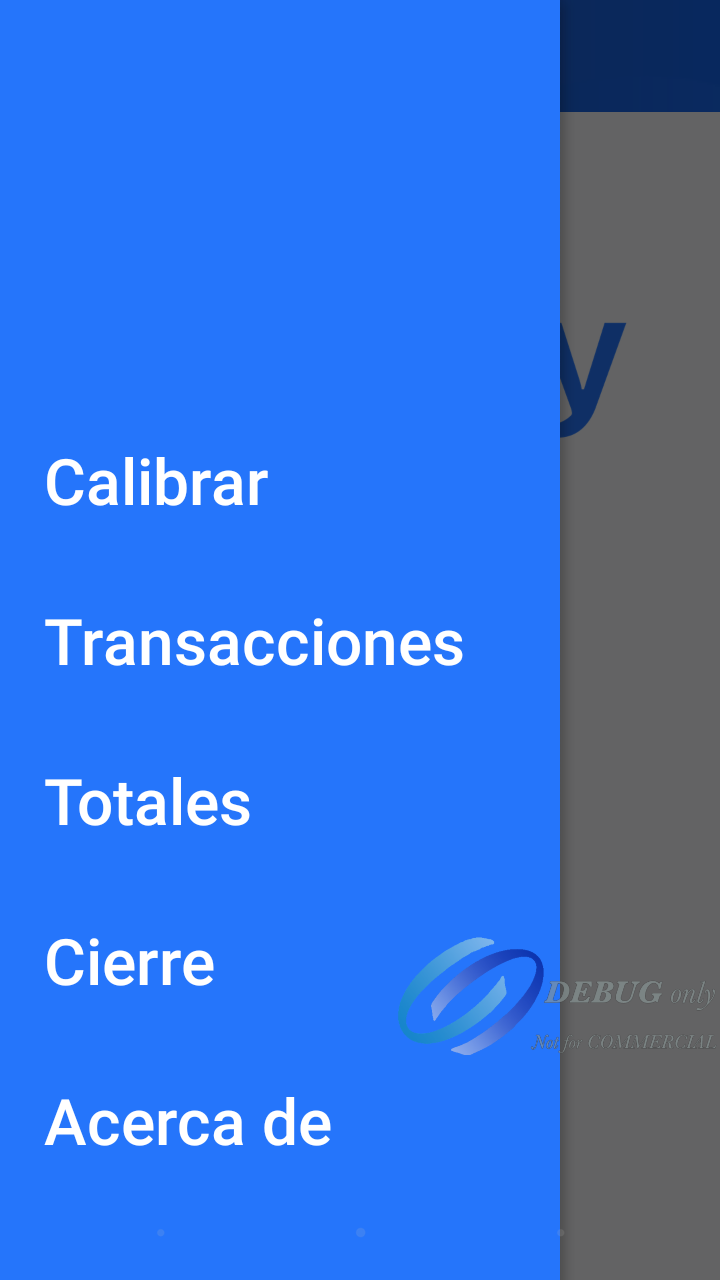
9. Special features
Restaurant menu:
Calibrate
- Transactions
- Totals
- Closure
- About
| Options | Description | Restrictions |
|---|---|---|
| Calibration | Allows you to make adjustments to the URL of the answering service. | Not applicable for this type of integration. |
| Transactions | Option that allows you to consult the transactions carried out in previous days. | Not available at this time for Smart PinPad. |
| Totals | Dentro de este menú se encuentra la opción “Detalle” que permite reimprimir ticket de venta. | Available |
| Closing | Allows cash cuts. | Available |
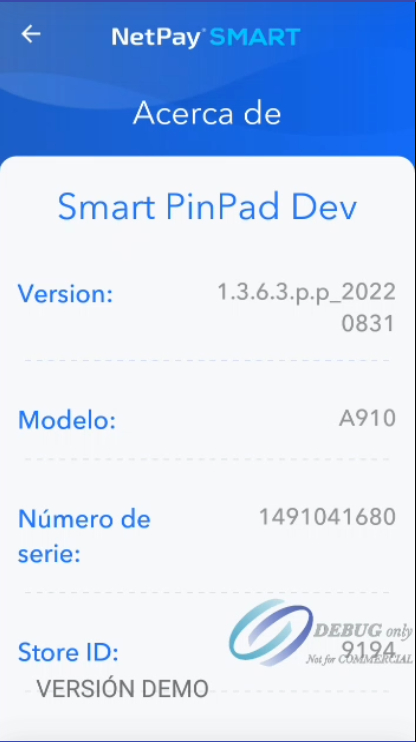
| About | La opción de Acerca de muestra el detalle de la terminal como versión, modelo, número de serie y store ID los cuales pueden ser utilizados cuando se requiera algún soporte de la terminal. | Available |
Select the top left button.

Options will be displayed.
As it is a COMM integration option one to calibrate will not be used.
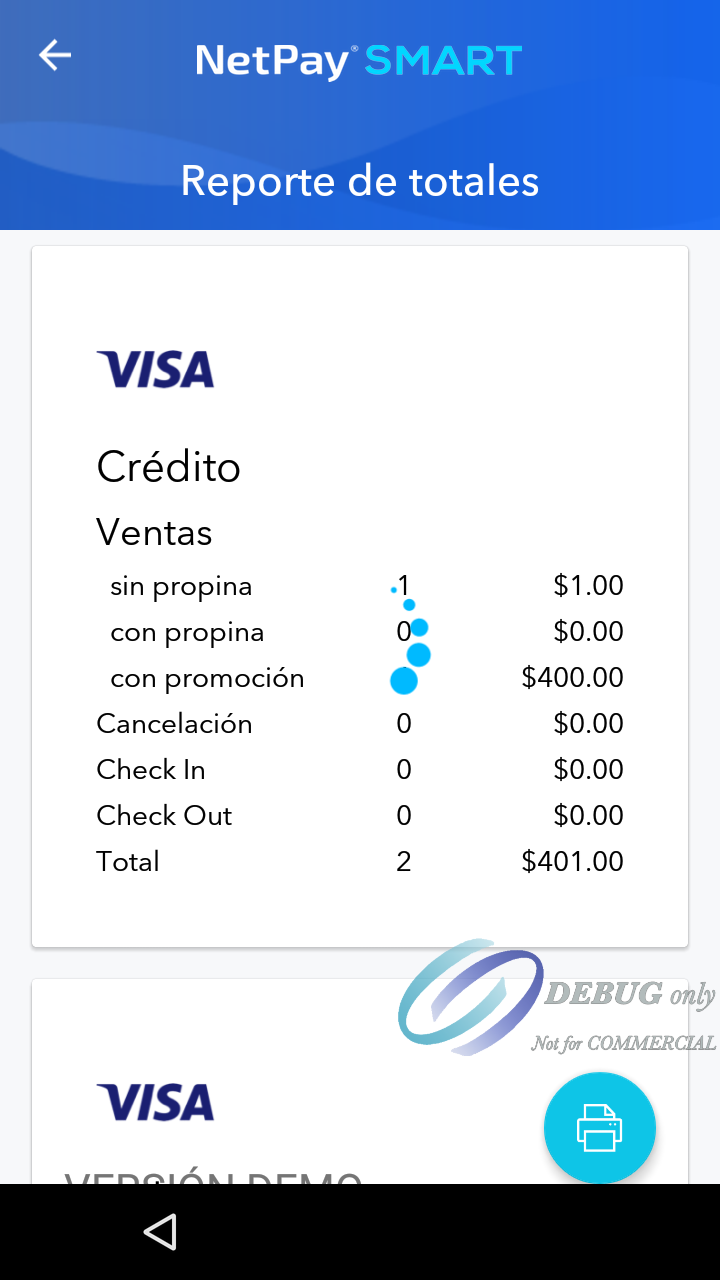
Option 2 Totals, two options "TOTALS" and "DETAILS" are shown.
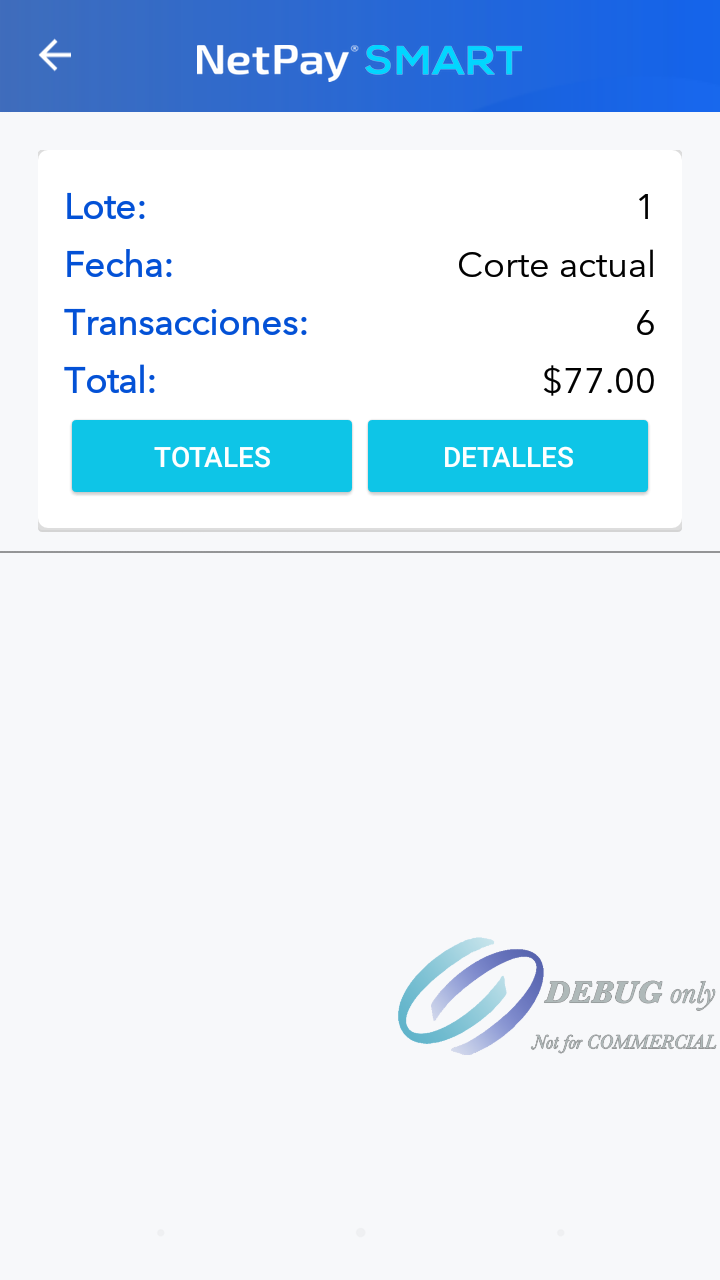
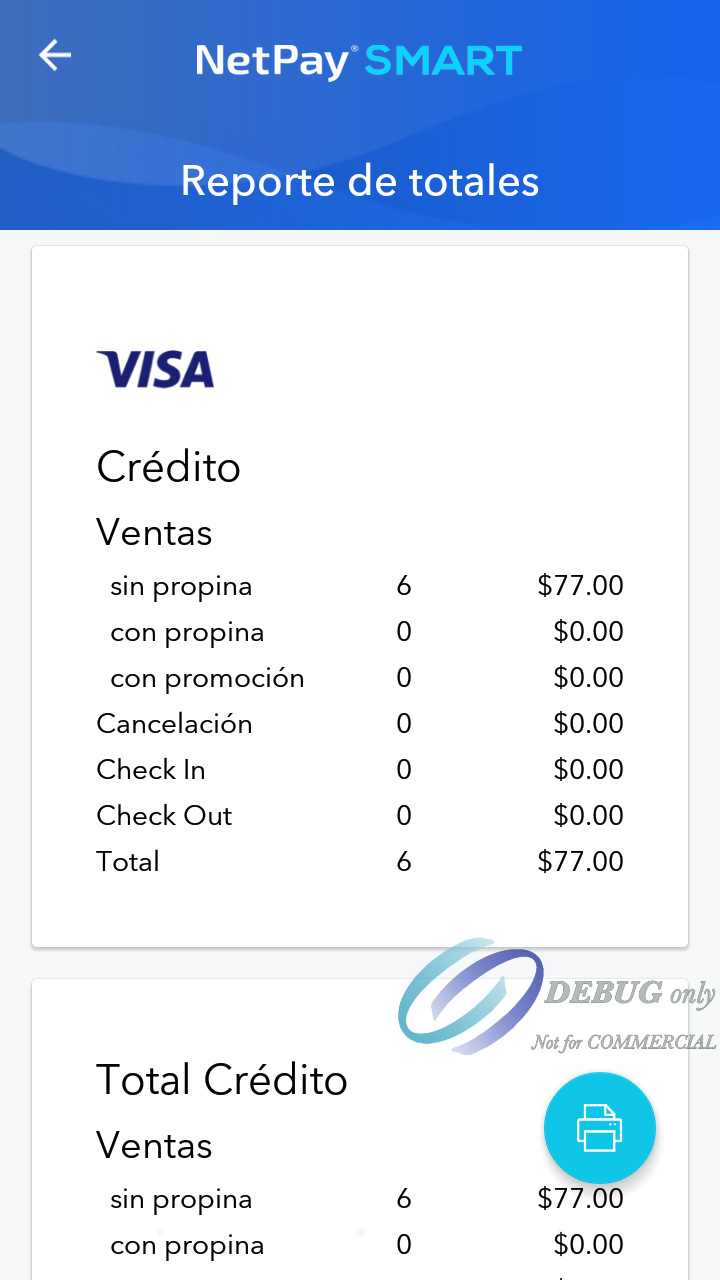
By selecting the "TOTALS" option.
By selecting the option "DETAILS.
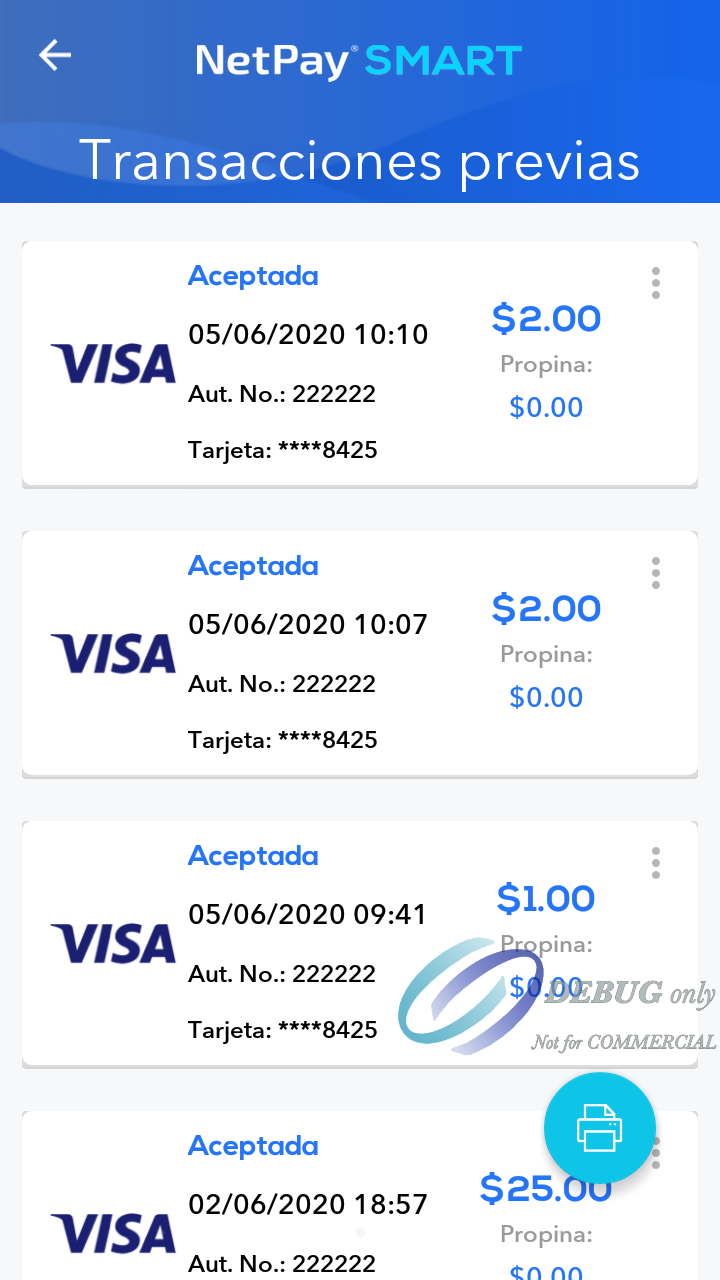
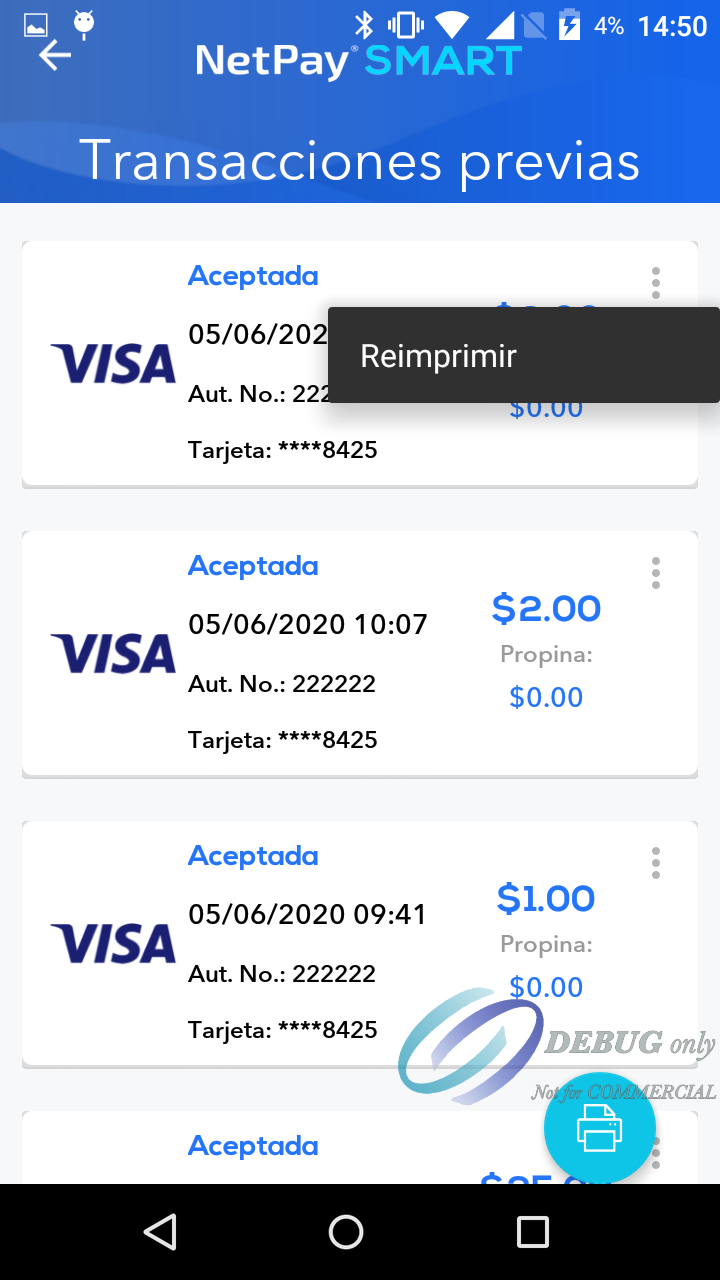
Select the desired transaction and press the three dots icon, the "Reprint" button will be displayed
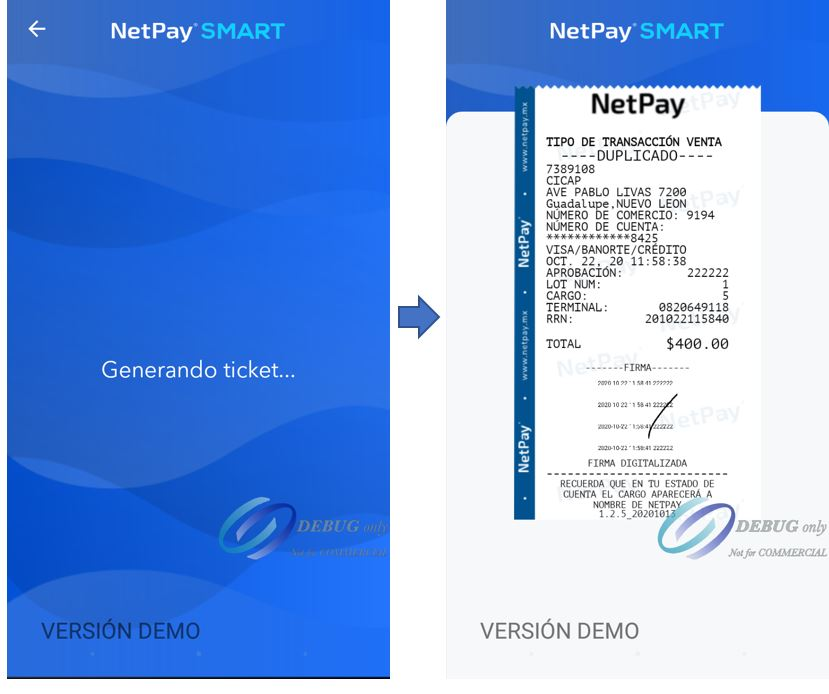
The terminal will show the generation of the ticket.
Option 3 Close.
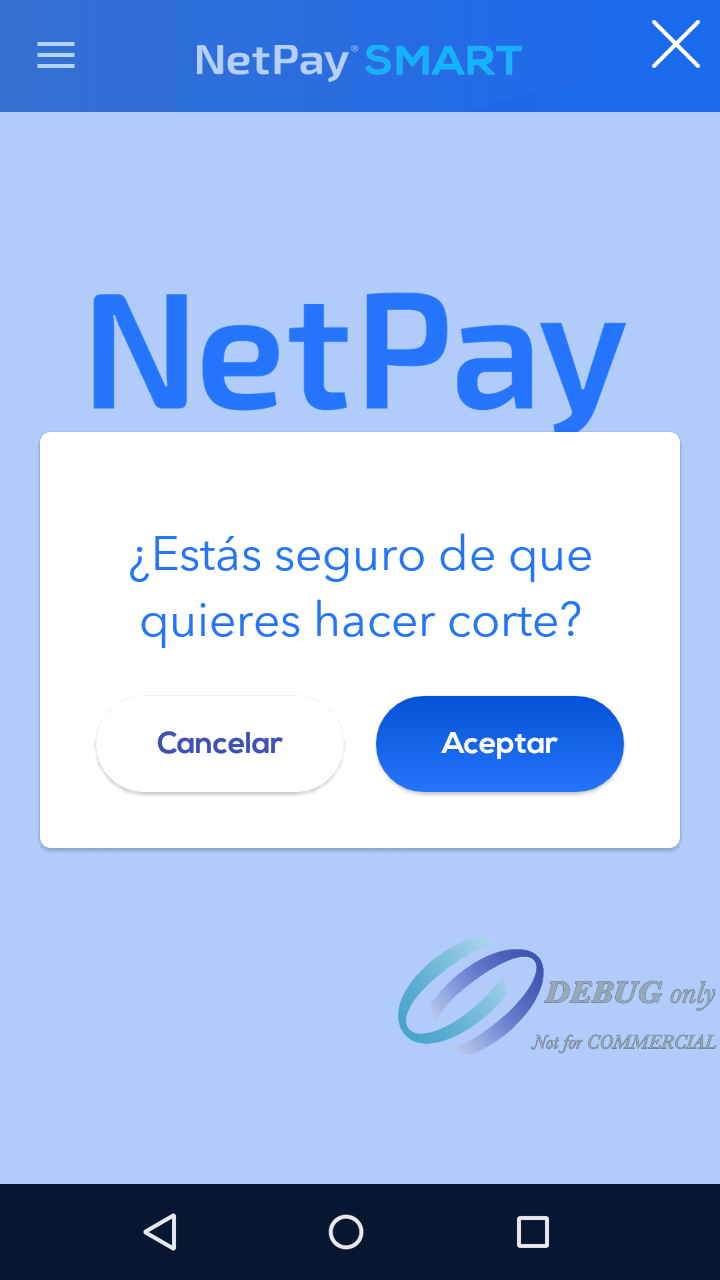
Pressing the "Accept" button will show the breakdown of the cut made.
Option 4 About.
Updated about 1 year ago